Over many years I have gained a ridiculous amounts of minis - suitably aided by 7 years working for GW and their rather too tempting staff incentives......
My wife has finally decided there is far too much stuff in the loft and it needs to diminish. She wanted rid of the lot, but let's be honest, it's never gonna happen!
So instead I have set about significantly downsizing by trading out a load of stuff I'm never going to use or paint (often in very favourable trades for the other party) and started acquiring a few bits and pieces for a combination of pet projects, stuff I've always wanted, or stuff that I can actually get painted reasonably well in a reasonable timescale.
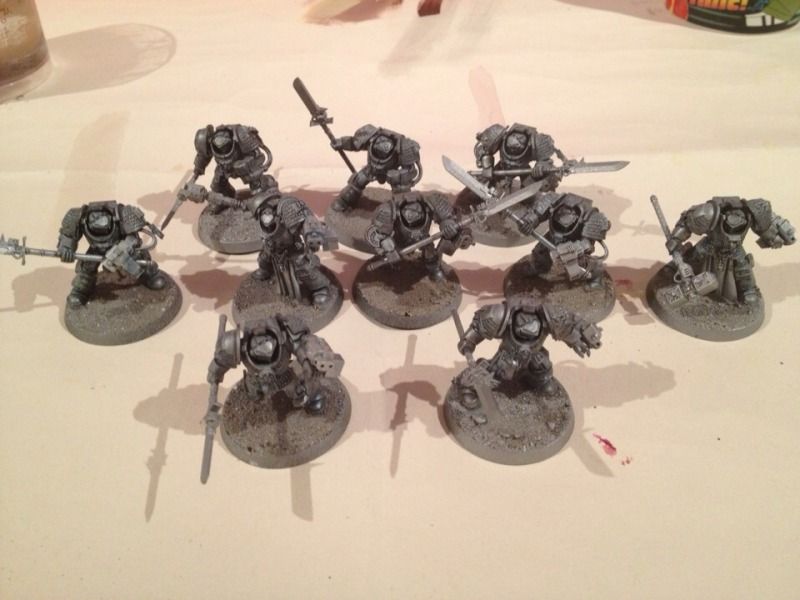
When I say "a few bits", in the case of the Grey Knights it seems to have ended up as "a lot of bits" - in fact in the region of 25 Terminators, 25 Power Armour, 2 Dread Knights, a Dreadnought, a Land Raider and the remains of a Rhino.
The aim is to start with a 1000 points and add 500 point blocks (or there abouts) of fully painted Knights in shining armour. Okay, not shining armour, as I always felt that Grey Knights should be rather greyer than bright silver, but at the same time I didn't fancy the idea of an actual grey army for two reasons. Firstly, the colour grey is just plain uninspiring. Secondly, I find it is actually very hard to pull off a very good grey finish - or at least a grey finish I'm happy with. Too much of a perfectionist I guess.
Enough preamble....
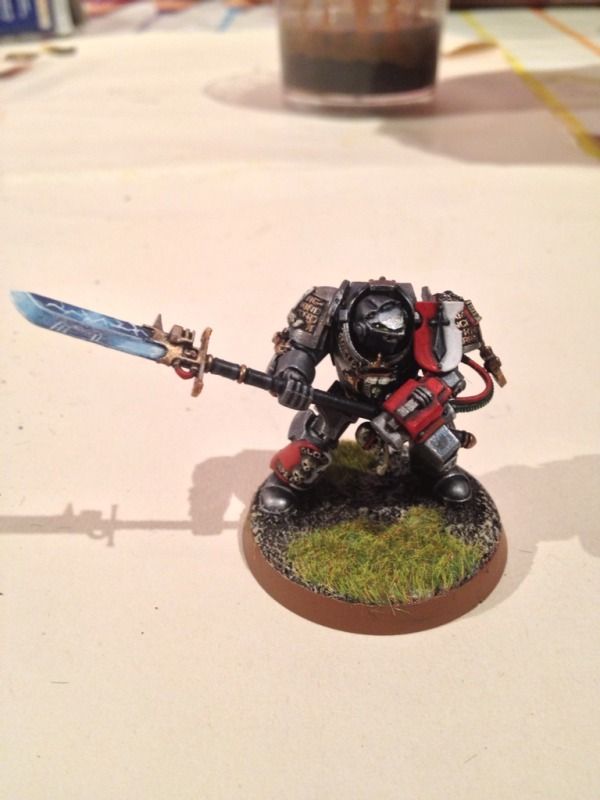
To get going I thought I'd do a single Terminator from this bunch:
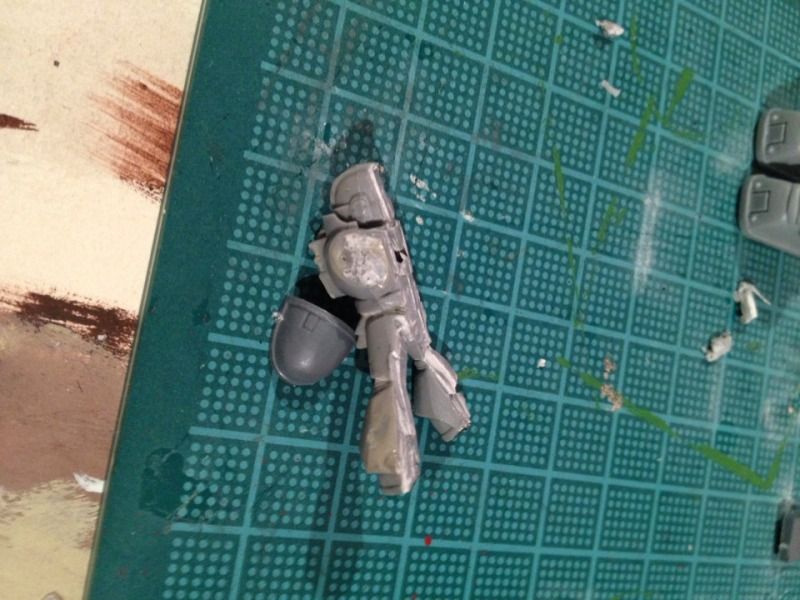
These came from Pig Of Sparta (check out his blog at
The Pig's Sty) and as you can see they are already basecoated (with a chainmail spray) and had a light wash of badab and asurmen blue.
They're not quite my imagining of the darker knights, so i set about them with a liberal wash of badab to dull them down before rehighlighting with a heavy drybrush of boltgun metal, a lighter drybush of boltgun/mithril silver and then a final very light drybrush of mithril. This was then washed with asurmen blue into some of the areas before being given a final line highlight on a few edges with mithril.
The areas for detailing were then picked out with a thin coat of chaos black.
The black areas (soft armour, halberd shaft) were then highlighted using a progressive mix of chaos black/enchanted blue/skull white, to a rich grey.
The red based in scab red with a small amount of chaos black mixed in and then highlighted through scab red to blood red.
The gold was based with a 1:1 mix of scorched brown and shining gold. This was then highlighted with shining gold, then a mix of shining gold with a little mithril silver in it. I then followed this up with a wash of devlan mud mixed with badab black. It was then rehighlighted with a mix of shining gold with a little more mithril silver in it, before edging the shoulder pad/engraving seam with badab black.
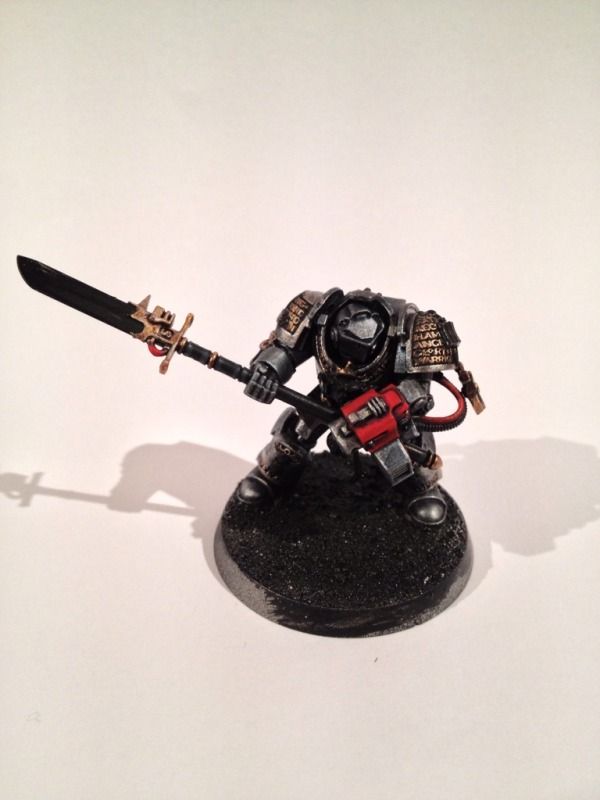
This took me to here:
Next up was the small details: Heraldry, Icons, etc and the bit I was dreading was the blue glow/reflective look on the Nemesis Force Weapon.
Most of the details are pretty standard affairs. The bones and pages were done using a mix of chaos black/snakebite leather/bleached bone/skull white. The reds as before. The eye lenses were based with dark angels green, highlight to the front with sunburst yellow, and shaded to the back with chaos black. A small white dot is put towards the black to give the illusion of reflection. I then has a couple of goes at the Force Weapon....... It didn't go well..... Or not in my view. I was told be a friend that it looked really good, but I wasn't happy, so it got stripped back and left with a basecoat until I could have a rethink.
At this point the mini was left sitting like this for a few days:
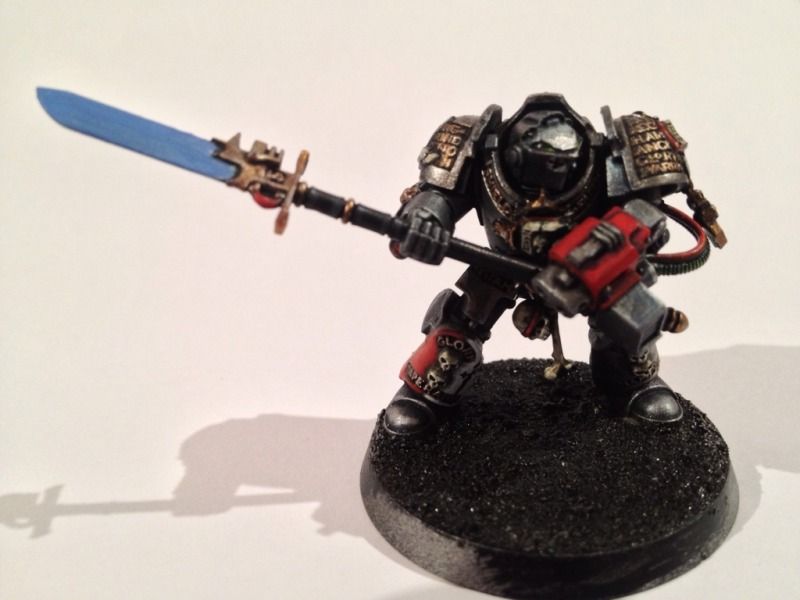
I finally solved the problem by picking up two of the new blues (Kantor blue and Lothern blue) and using them in the mix. After another half dozen attempts I got something that I think is reasonable, but could still be improved.... The fact that there are another 40-odd Knights to get through should give me plenty of practice.....
Any way here's the finished product, hope you enjoy!